Credit Packages
Optimize your Versium REACH costs by pre-purchasing credits
For users without a Versium REACH subscription, credit packages offer a discount over purchasing lists individually. This page will cover how to convert your trial or pay-as-you-go account to credit packages, how to manage your credits, and what to expect when using them.
For frequent users, contact our sales team for information about our subscription offerings to get the most savings!
Getting Started
To get started with credit packages, first ensure you've added a credit card to your account. See the Manage Payment Information page for more info.
You can purchase your first credit package on the Credit Packages page in your account settings.
If you don't see the page shown below on your account, contact our sales team to get access.
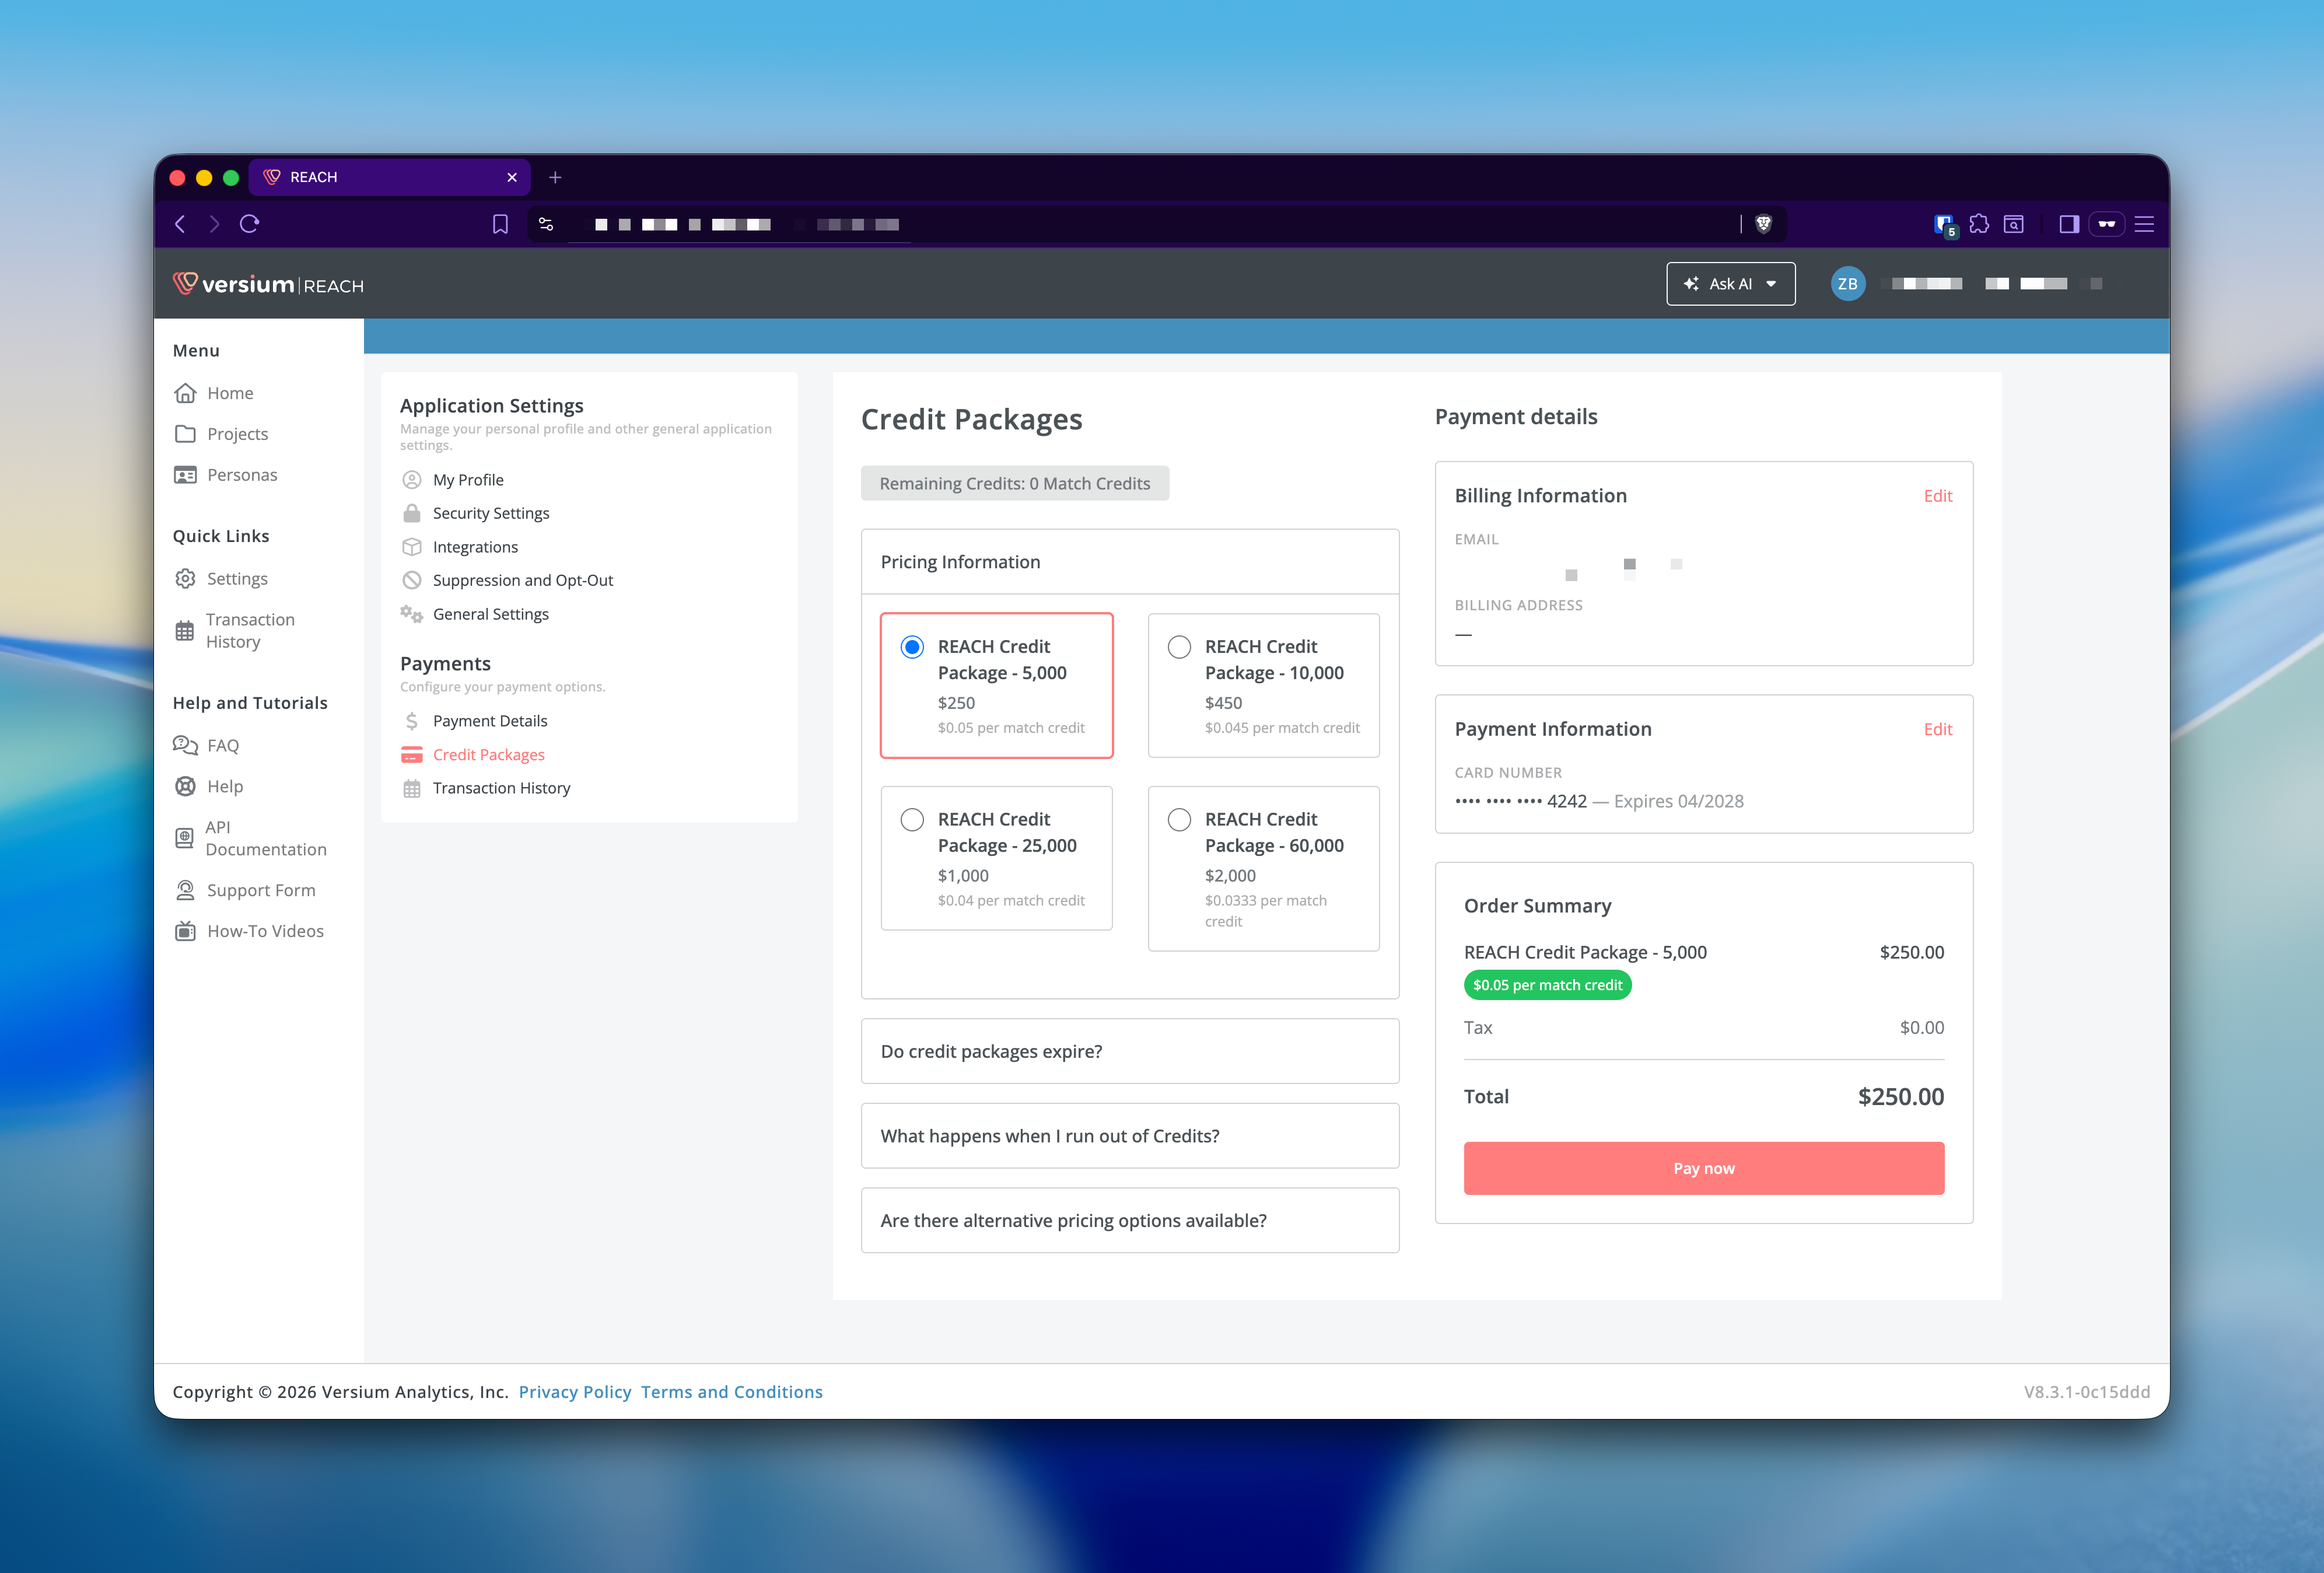
Once you have purchased your first credit package, you will see your remaining credits in the top bar. Any new lists you run will now use your credit balance instead of charging your card directly.
Keep in mind, if a list costs more credits than you have available on your balance, you may be blocked from downloading it until you purchase additional credits, or your list may be partially processed to prevent a negative balance. To avoid this, check out the next section on auto refills.
Auto Refill
To avoid service interruptions, it is recommended to enable auto refill to automatically purchase additional credits when your balance runs low. In the Payment Details settings page, enable auto refill, choose your desired refill package and click Save.
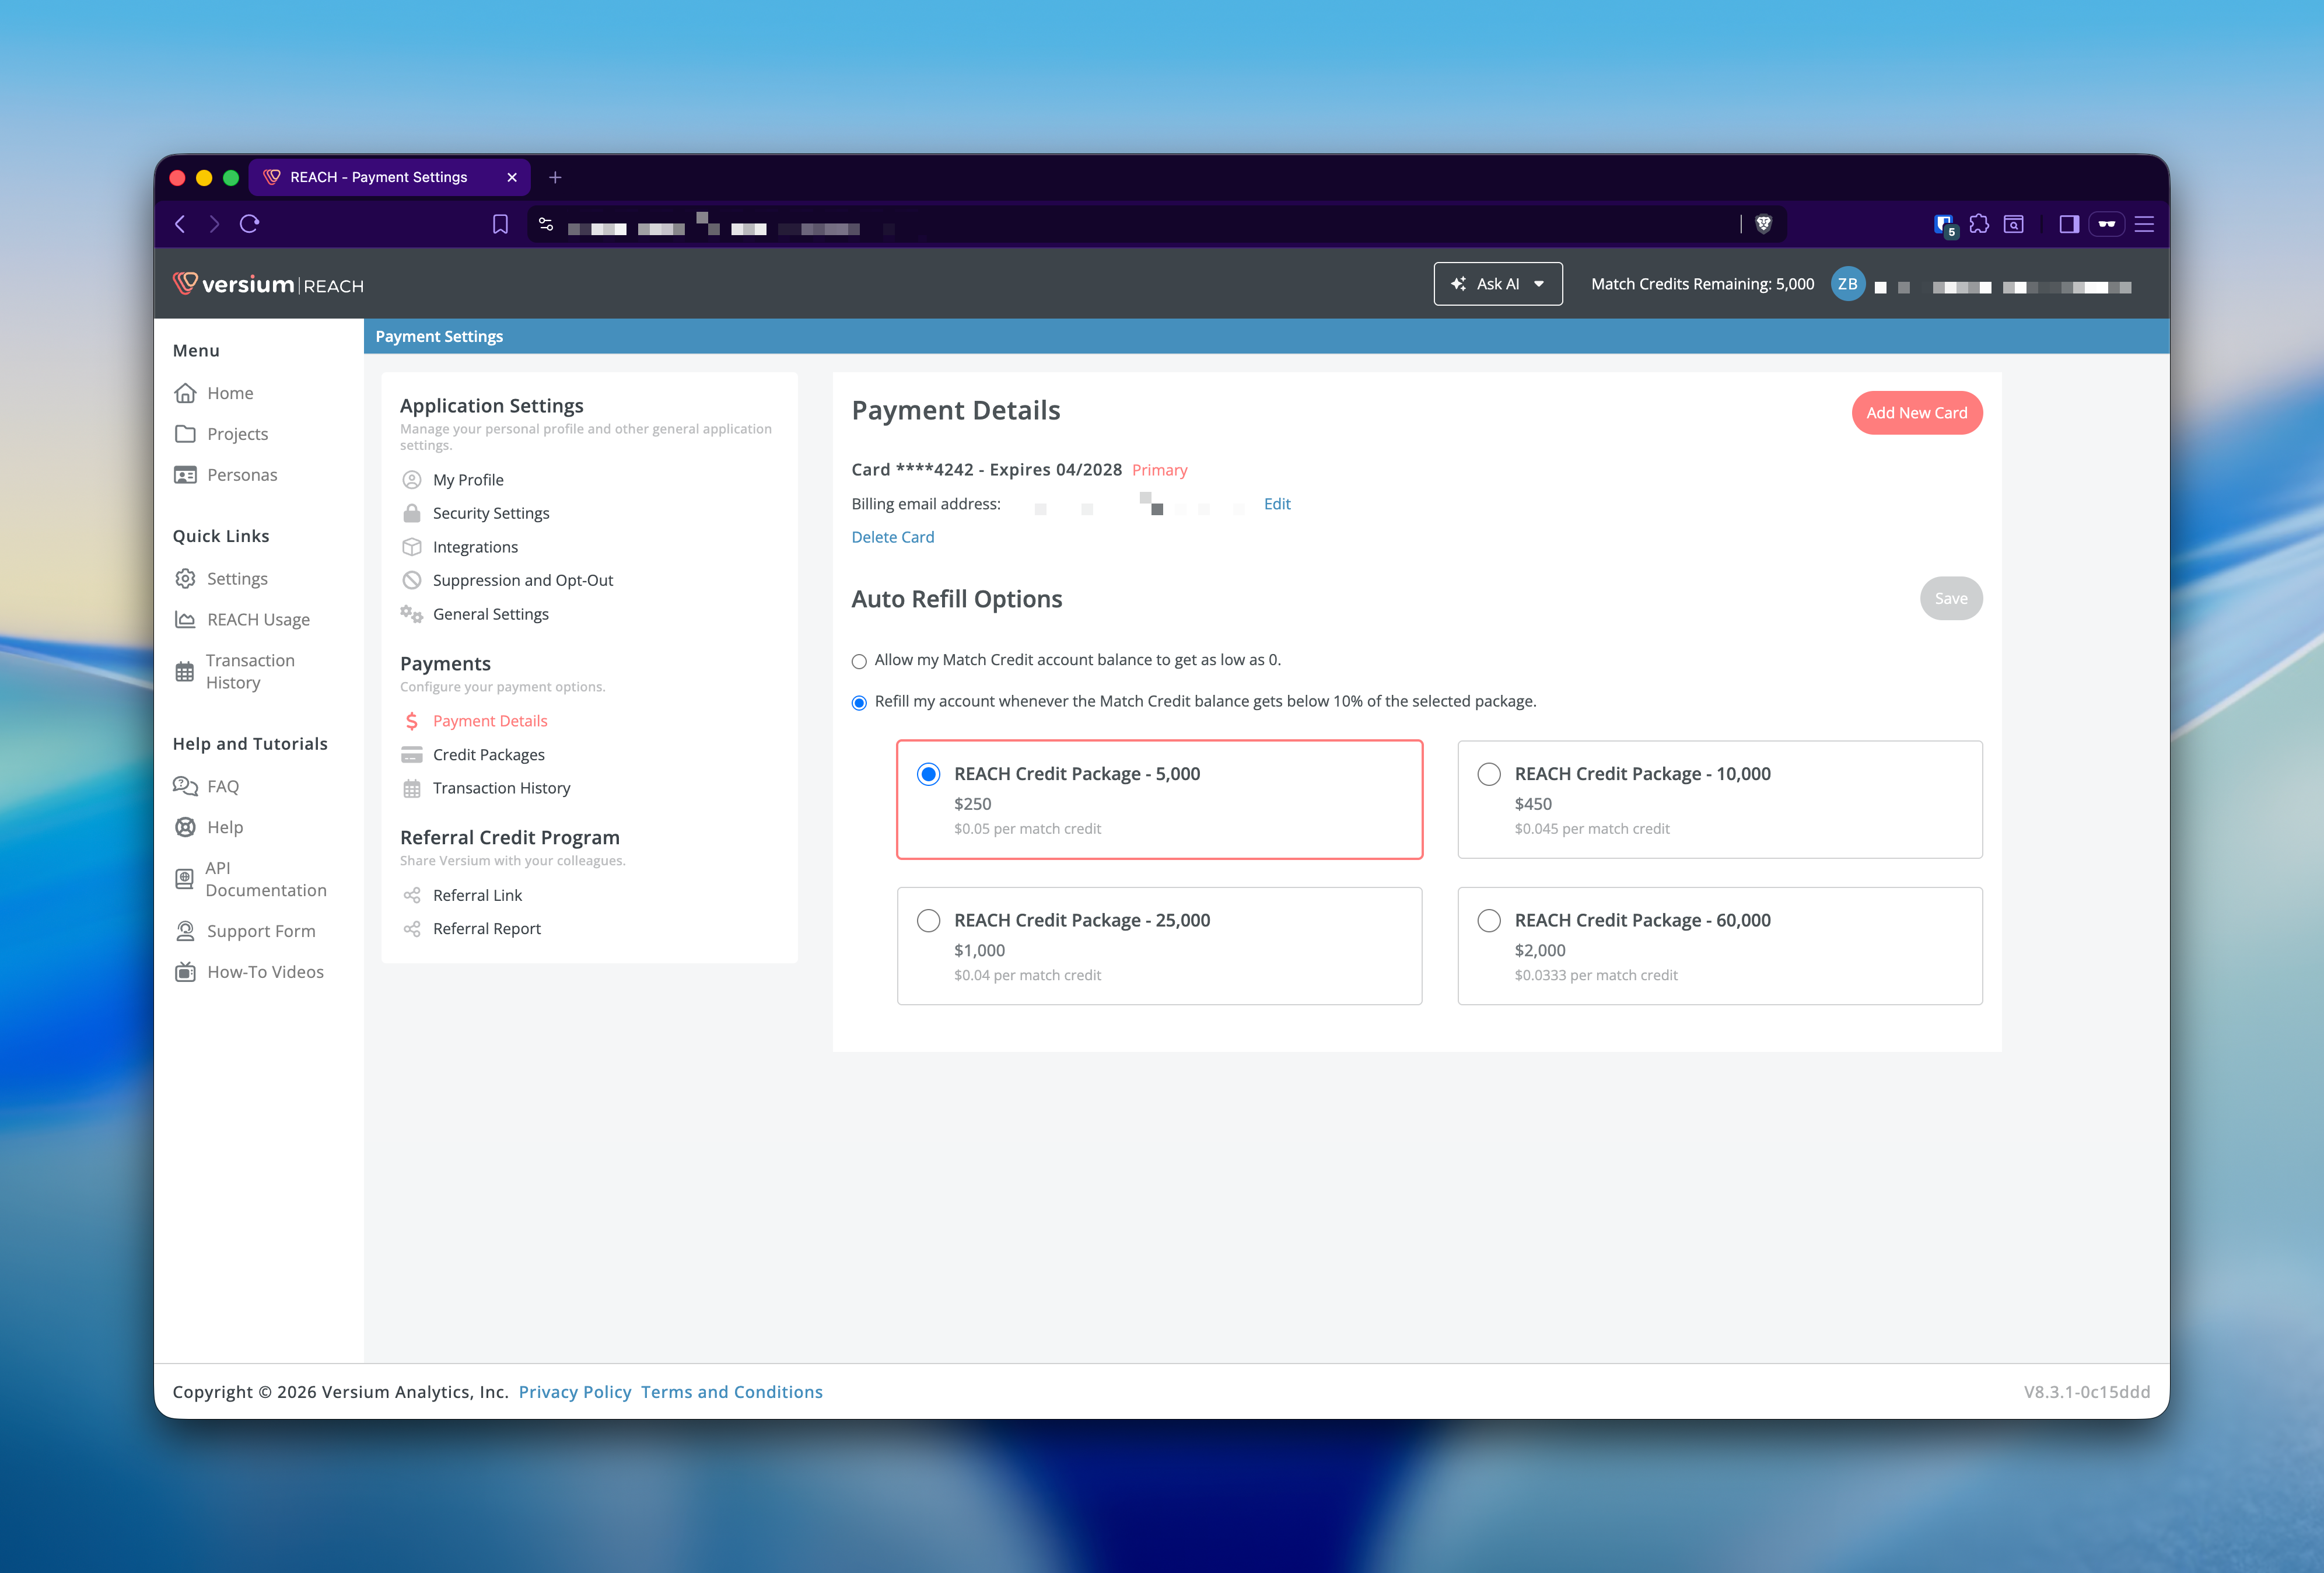
With auto refill enabled, REACH will automatically purchase your chosen package when your credit balance drops below 10% of that package's credit allotment. This applies to API usage as well as lists processed through the web app.