Walkthrough - Create a new Business Audience
Create a persona audience in Versium REACH and upload it to use in LinkedIn
For those of you who like to jump right in, this walkthrough shows you how to create a new audience, add online contact information, and then export the audience for use in a LinkedIn Ads campaign.
This walkthrough shows you how to:
- Create a Persona audience — See how you can create a persona of the types of company contacts you’re looking for, and create an audience from it.
- Export your new audience — Export your new Persona online audience.
- Import your audience into LinkedIn Ads — Use your audience for a LinkedIn Ads campaign.
Step 1. Create a new Persona audience
You probably have a good idea of who your ideal customer is. What kind of company they work for, their titles, and where they’re located. You can use that knowledge to define a persona, and then have Versium REACH find people that match that persona, to create a Persona audience. You don’t need an input file to create this type of audience, so you can try it out right away.
- From Home, select Persona Audience.
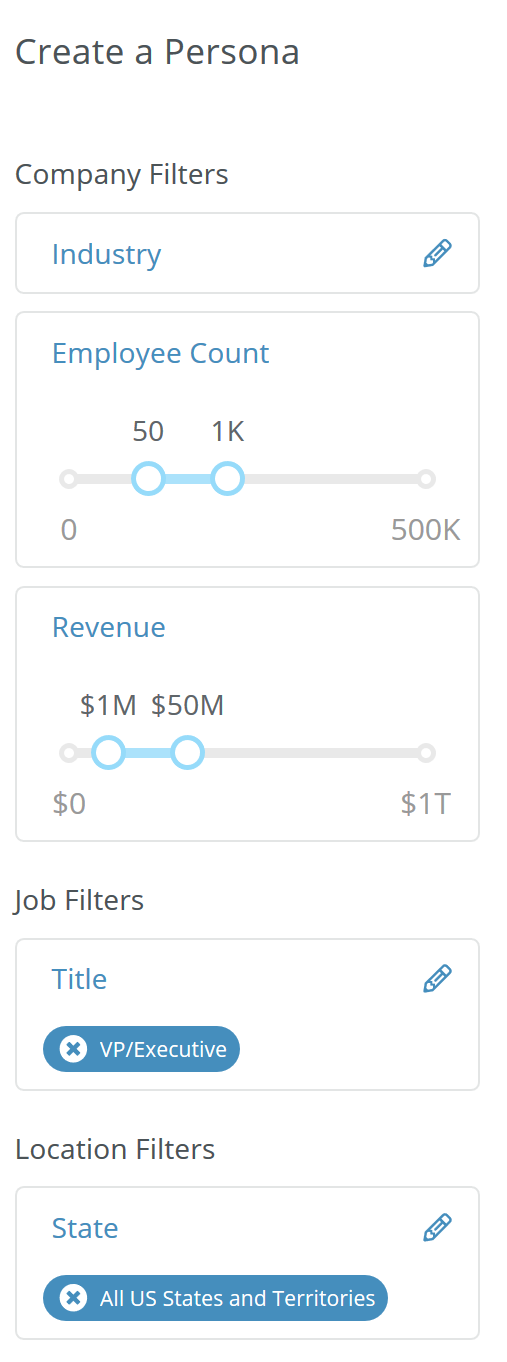
- In Create a Persona, set all the persona details you’d like to target. For example, here’s what your persona would look like if you want to target VPs and Executives at companies with 50 to 1000 employees with a revenue range of 1M to 50M.
TipTo the right, check out how many business people records are available for this persona in the Versium REACH database. Below that, you’ll see sample records.
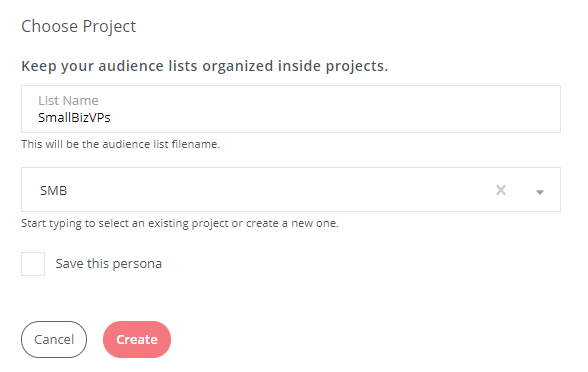
- In Name Your Audience and Choose Project, enter a name for your Persona audience list, and choose your project. Make them something descriptive that helps you remember what your persona selections were, like “SmallBizVPs” for your list, and "SMB" for your project.
- Underneath your filter selections, click Create. Versium REACH starts creating your audience. You can leave this screen and come back later when the audience is complete.
- To see your List Insights, go to the project you saved it in, and select the file. List Insights give a visual view into your audience details.
TipScroll through this report to get insights on your new audience.
Up Next — Export your new audience
Step 2. Export your new audience
Now that you’ve created an audience based on your ideal persona, and then created an online audience, you’re ready to export the audience list for use on LinkedIn, Hubspot or other marketing platforms. There are two ways to export an audience:
Export from List Insights
- In your SMB project, select your list. If you’ve been naming it as suggested in this walkthrough, it’ll be named SmallBizVPs-audience-extension.csv.
- In the List Insights at the top right, click Export Your New Audience.
Export from the Project List
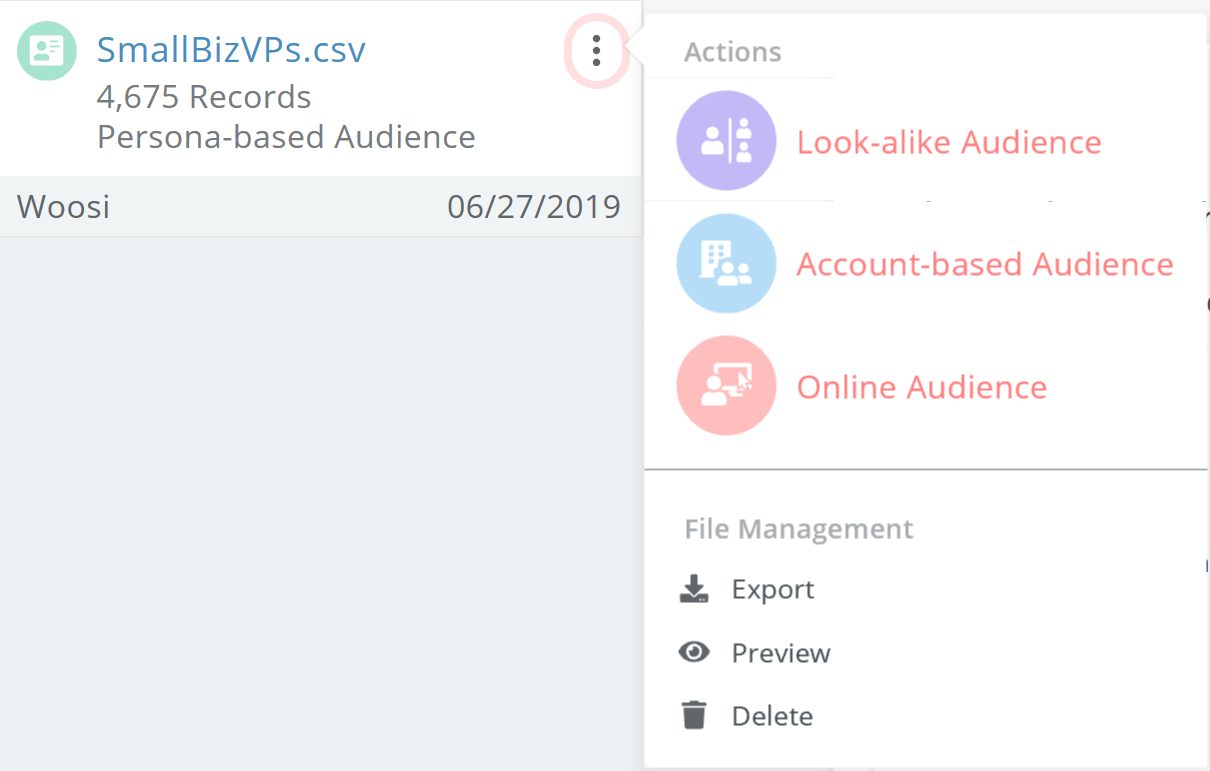
- In your SMB project, find the SmallBizVPs.csv Persona-based Audience.
- Click the Action menu (three vertical dots), and select Export.
Up Next — Import your audience to LinkedIn Ads
Step 3. Import your audience to LinkedIn Ads
You can now import your new audience into LinkedIn Ads. For the most detailed and up-to-date instructions, see LinkedIn Ads help.
- Edit your audience to match LinkedIn requirements:
- For an account list, remove all columns except the Business Name and Domain columns, and change these column names to companyname and companywebsite, respectively.
- For a contact list, remove all columns except the email column.
- In LinkedIn Campaign Manager, go to Account Assets, and select Matched Audiences.
- Click Create Audience, and then List Upload.
- Click Select List and select your edited list.
- Click Upload. You can now use your new audience in a LinkedIn campaign.
What's Next
Updated 8 months ago
