Guide: Consumer Audience Builder
Create targeted consumer lists efficiently using the REACH platform's Consumer Audience Builder feature.
This guide will navigate you through each step required to build your list.
Steps for Creating a Consumer Audience
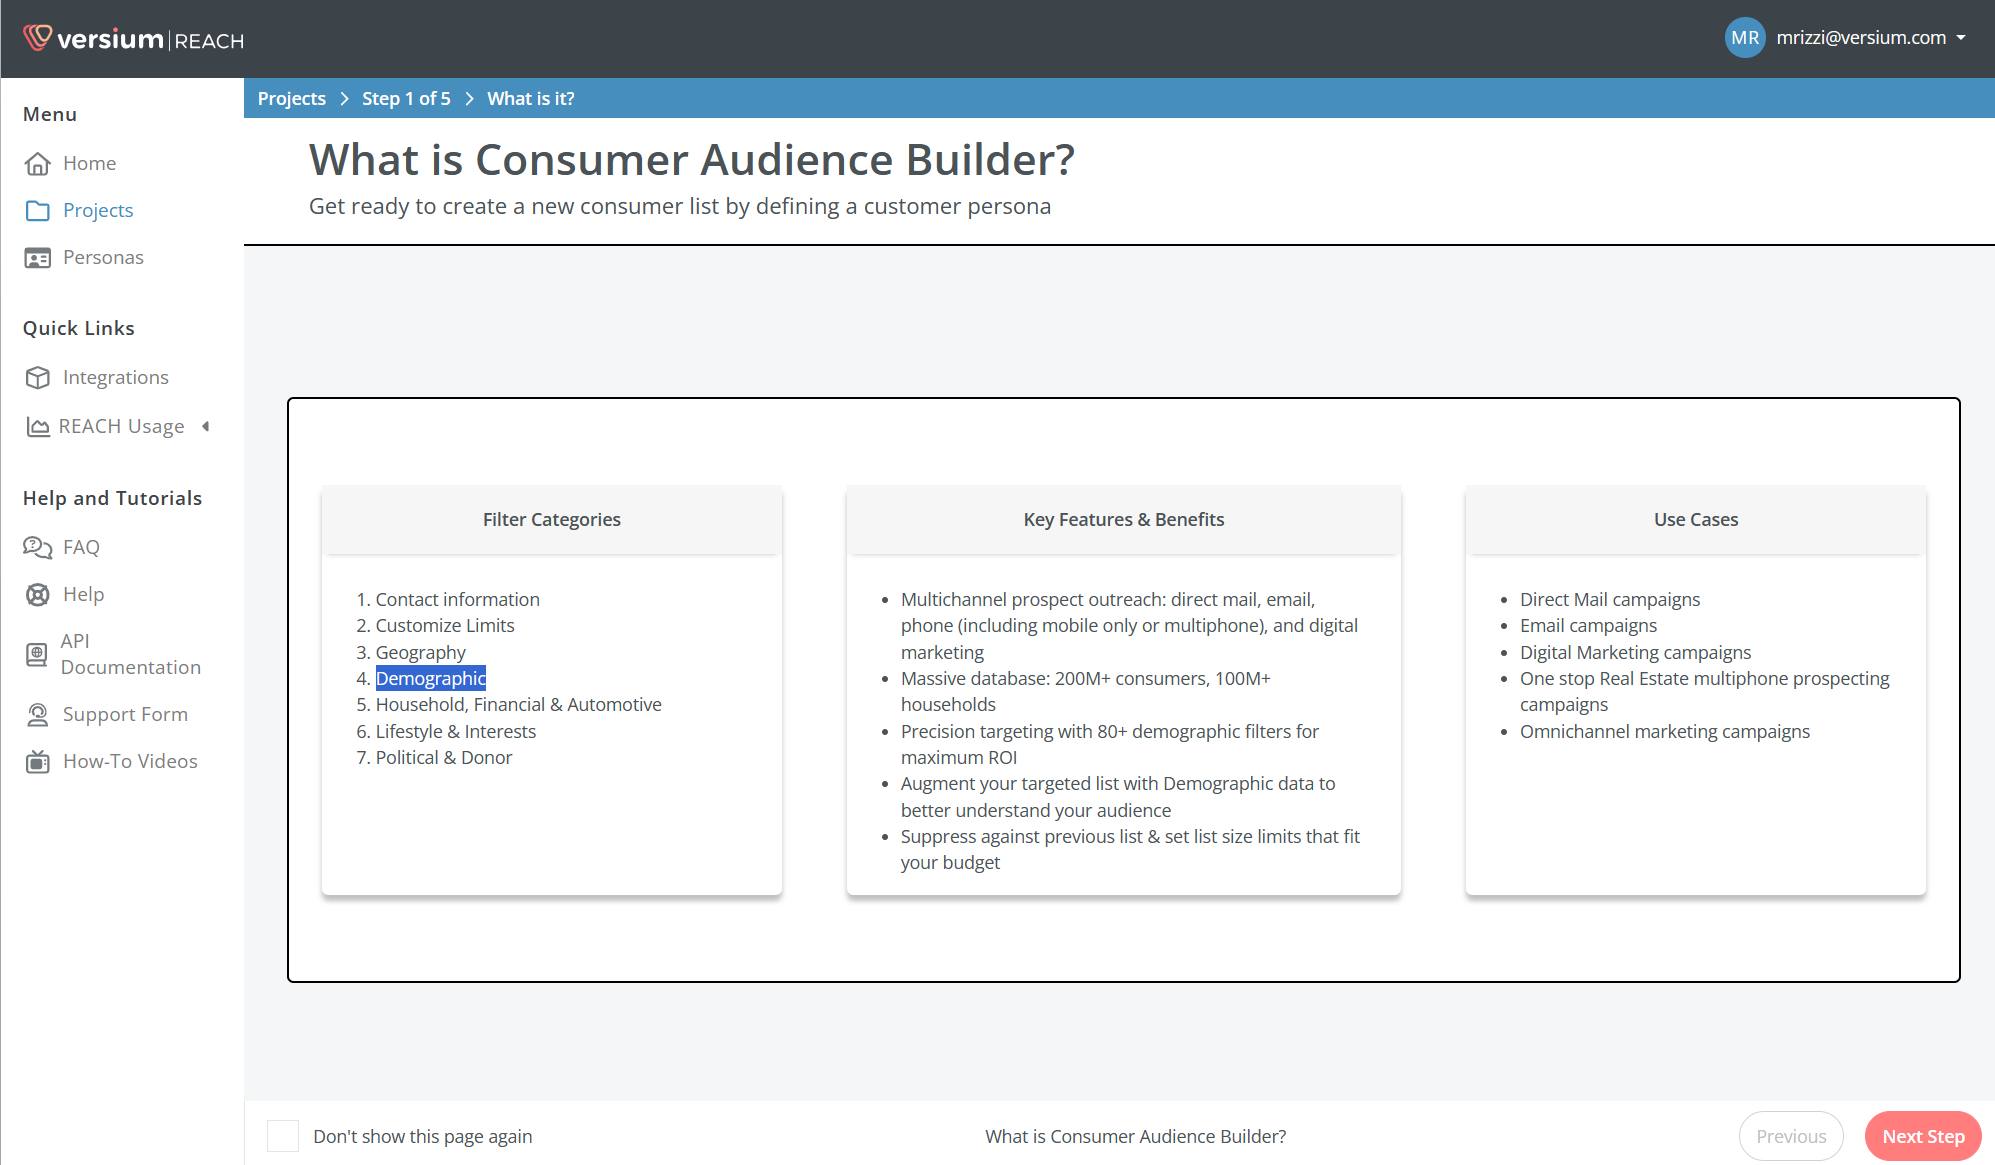
1. Access List Generation
Navigate to the Consumer Audience Builder section:
- Find
Consumer Audience Builderon the REACH Home Page.- In future sessions, if you wish to skip the List Generation Overview page in the future, check "Don't show this page again."
- Click
Next Stepto proceed.
2. Selecting Filters
- Apply filters in the specified order to define your consumer list:
- Contact Info — This is the initial filter which must be applied to activate subsequent filter options.
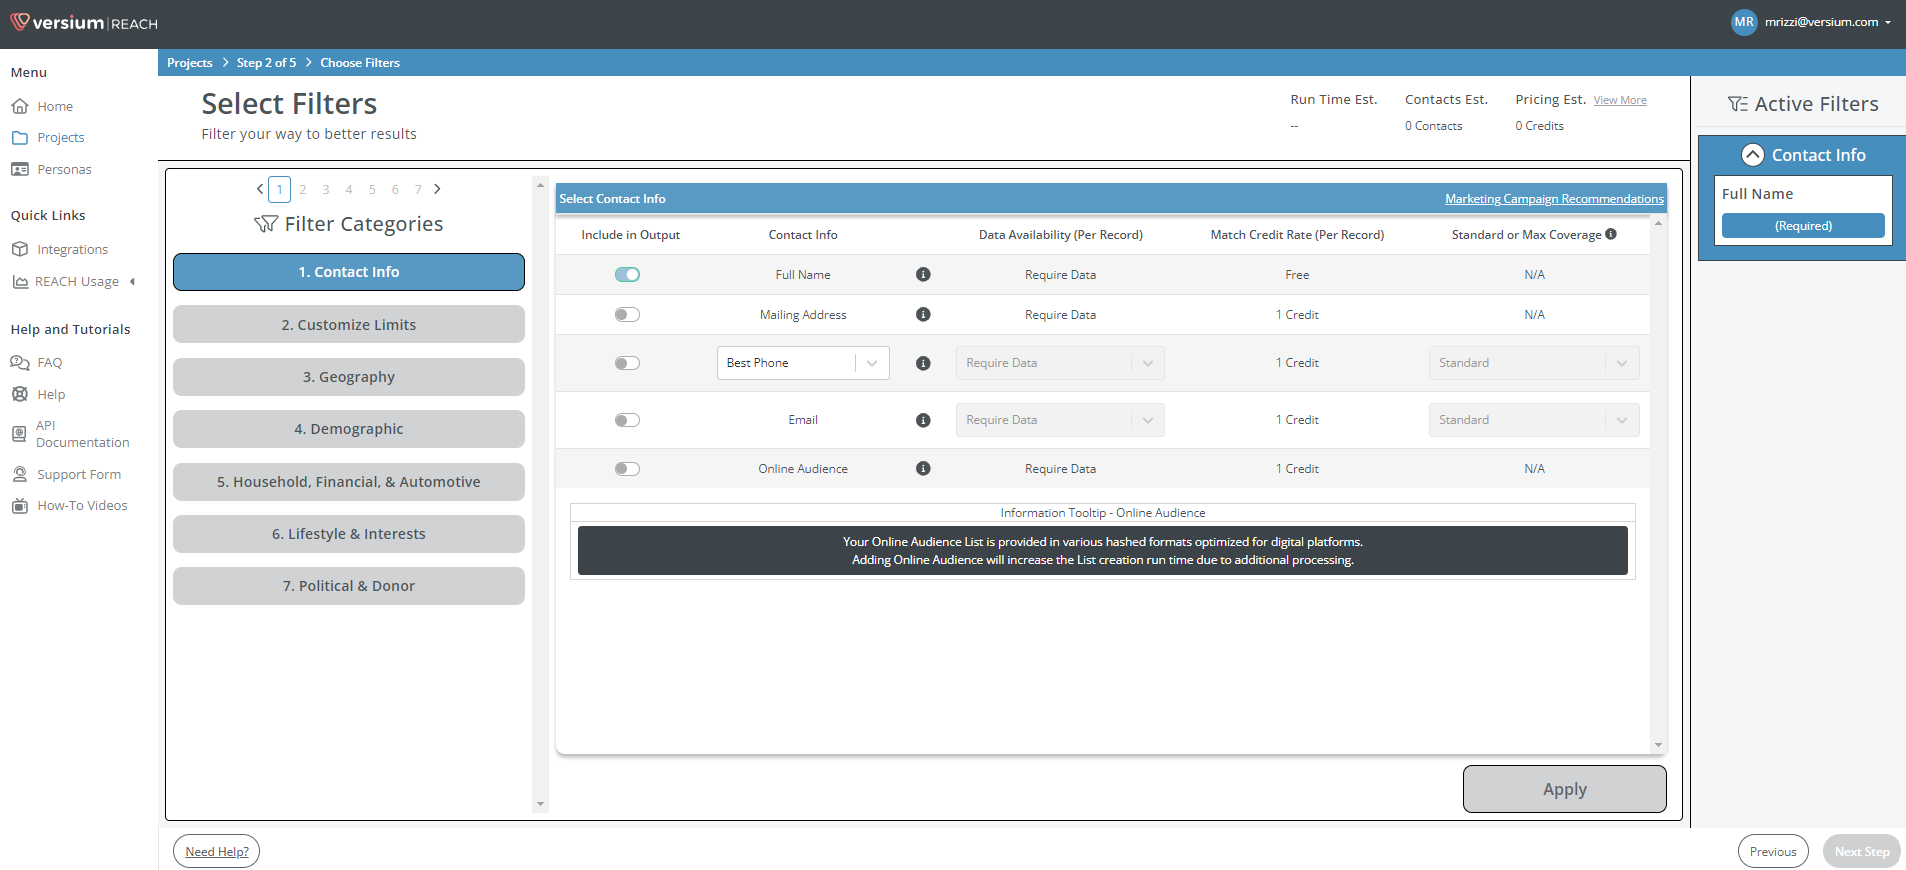
- Customize Limits — Once the Contact Info filter is in place, use this filter to narrow down the list criteria.
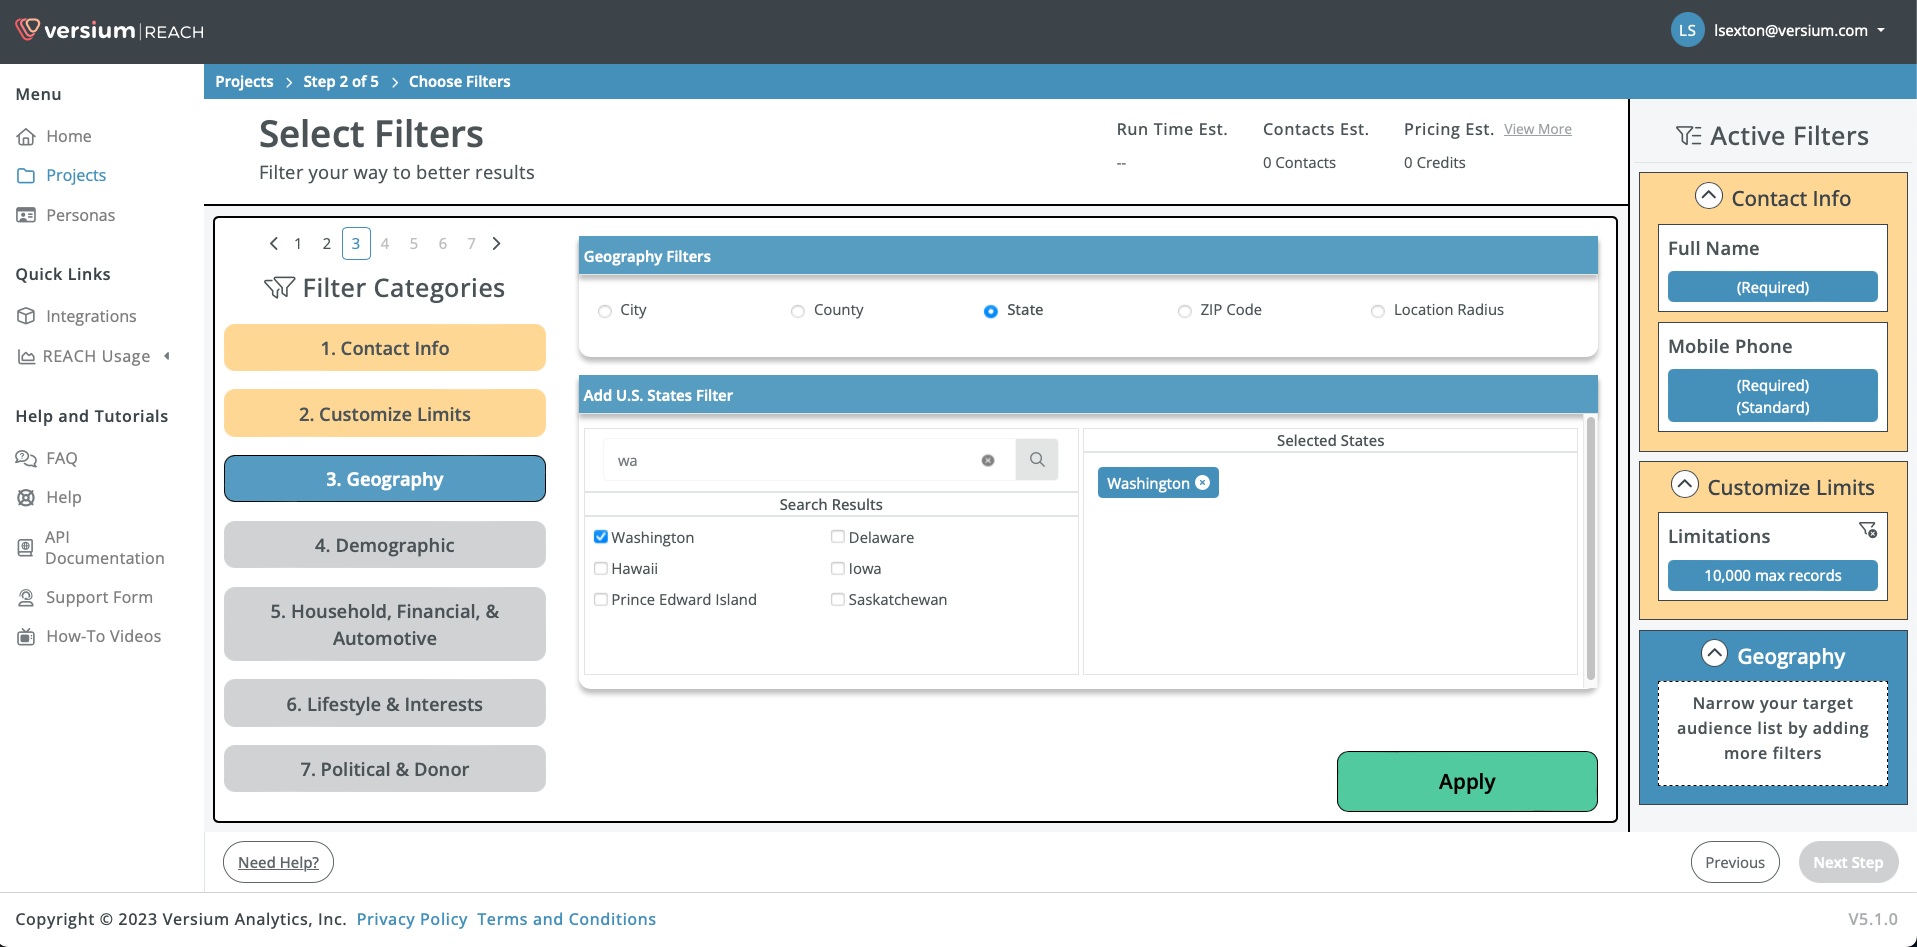
- Geography — Following the Customize Limits filter, select this to specify the geographic range of your target consumer list.
- Contact Info — This is the initial filter which must be applied to activate subsequent filter options.
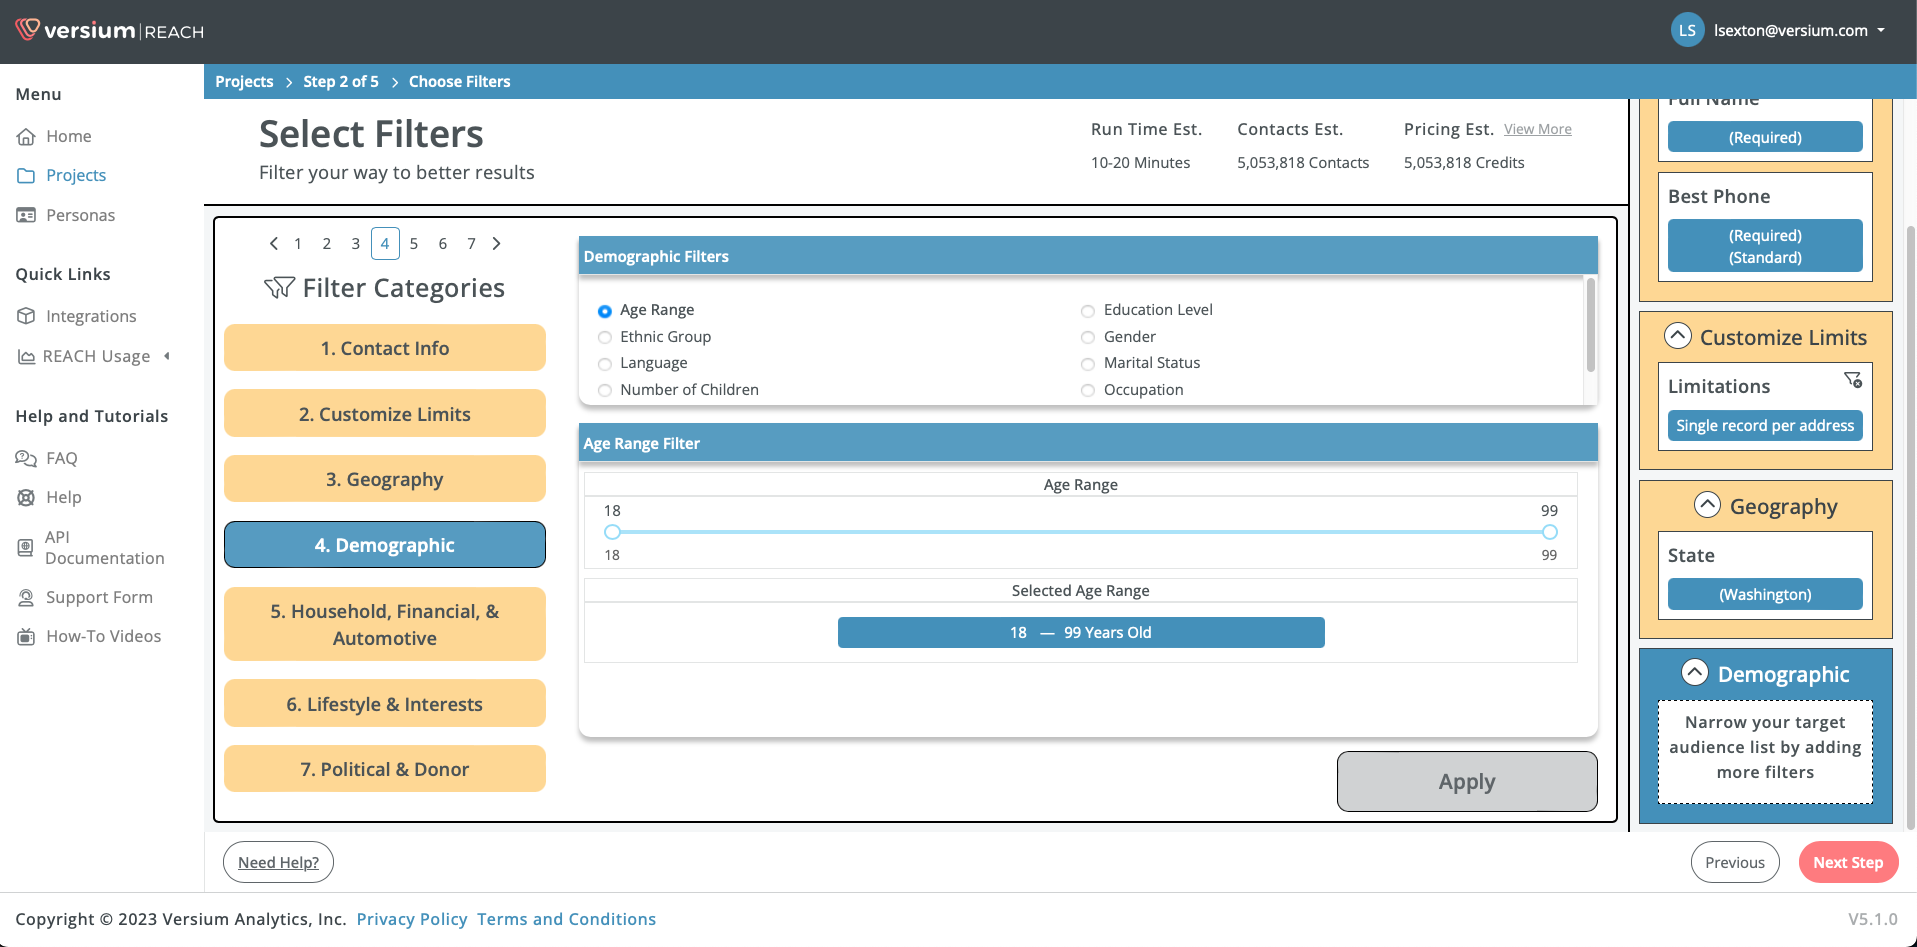
- After setting the mandatory filters, you may enhance your list by applying additional, optional filters:
- Once you have selected all desired filters, click
Next Step.
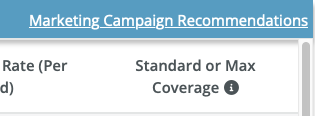
Tip: Uncertain about filter selection? Use Marketing Campaign Recommendations or the Add+ button for automated filter selection based on your campaign type.

3. Add Data to Persona List
Enhance your list with additional data:
- Choose to include more data types such as:
- Demographic
- Household, Financial & Automotive
- Lifestyle & Interests
- Political & Donor
- Confirm your choices by clicking
Next Step.
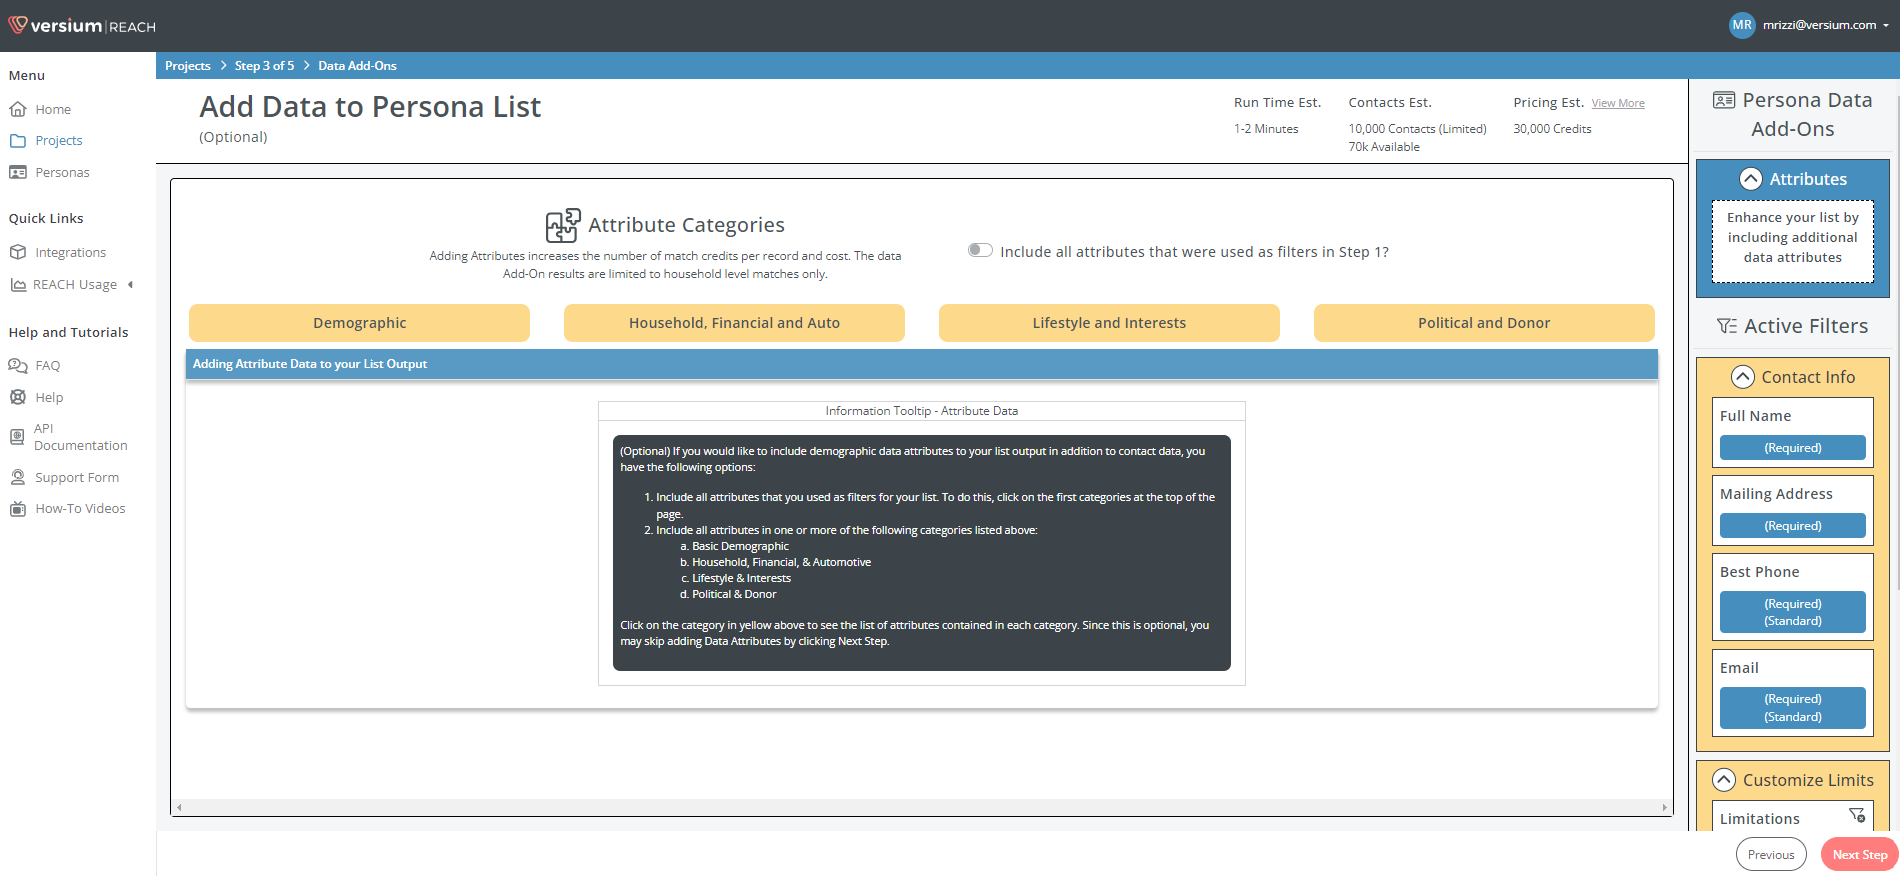
Note: To carry over all demographic attributes used in filters, toggle on "Include all attributes that were used as filters in Step 1?".
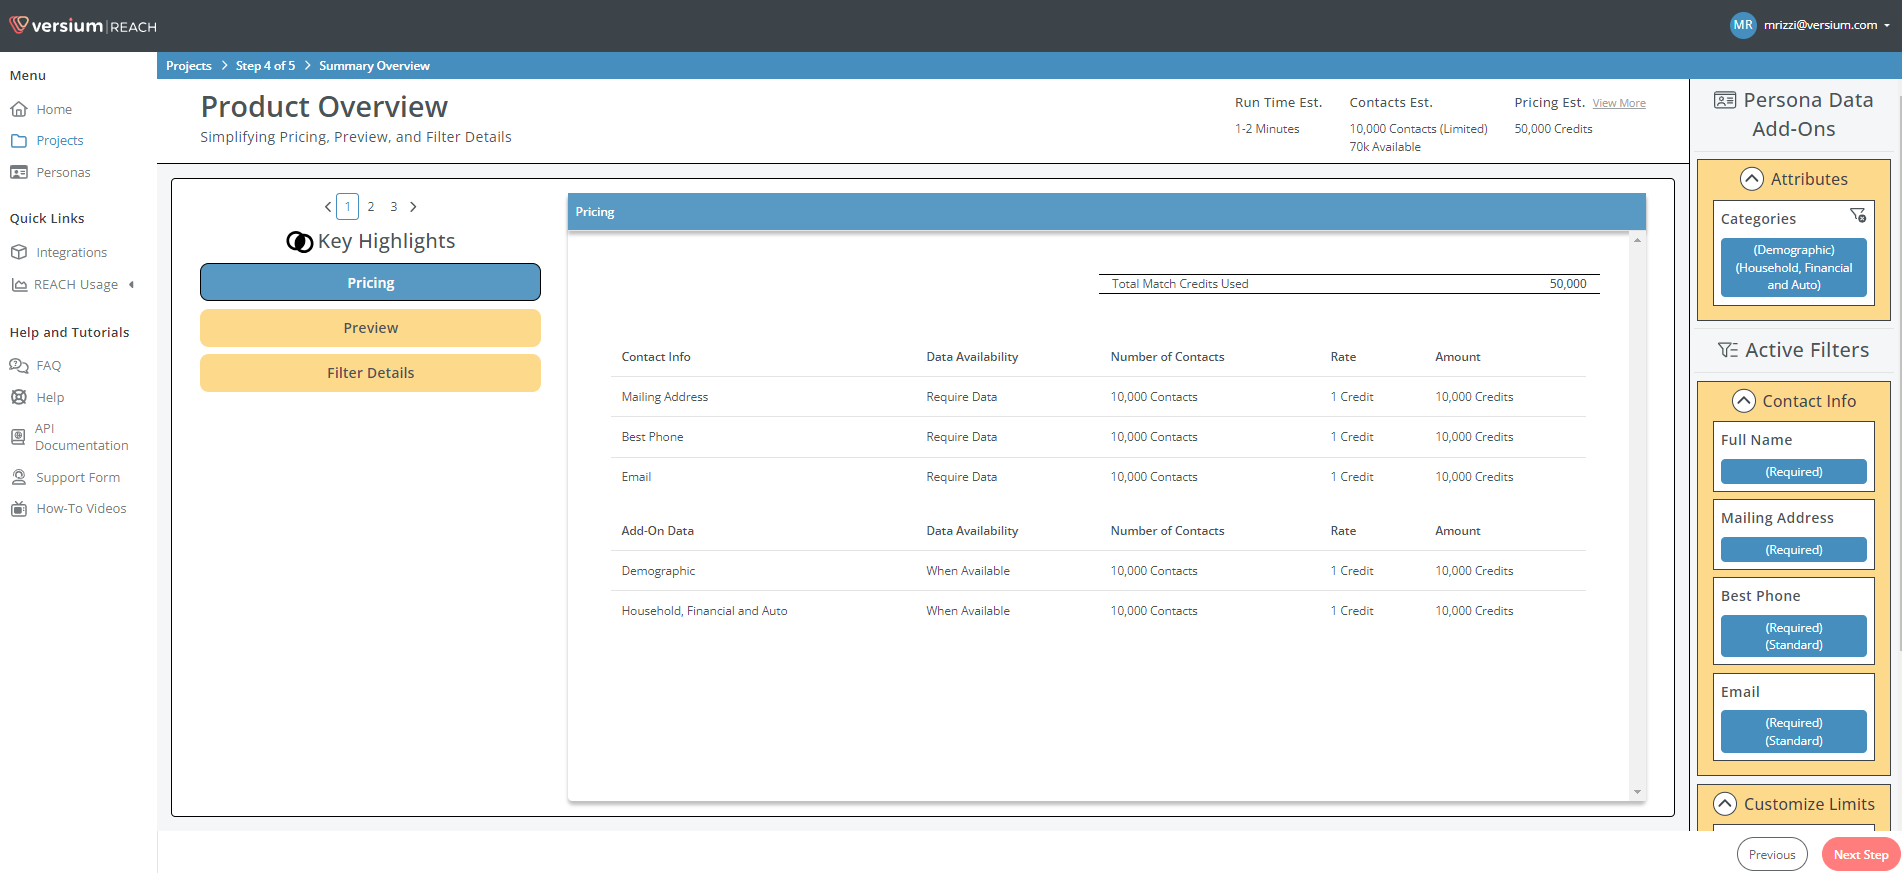
4. Review Product Overview
Examine the summary and cost of your list creation:
- The Product Overview page will display the credit usage and a summary of the filters applied.
- Verify your selections and review the data preview and costs.
- Continue by clicking
Next Step.
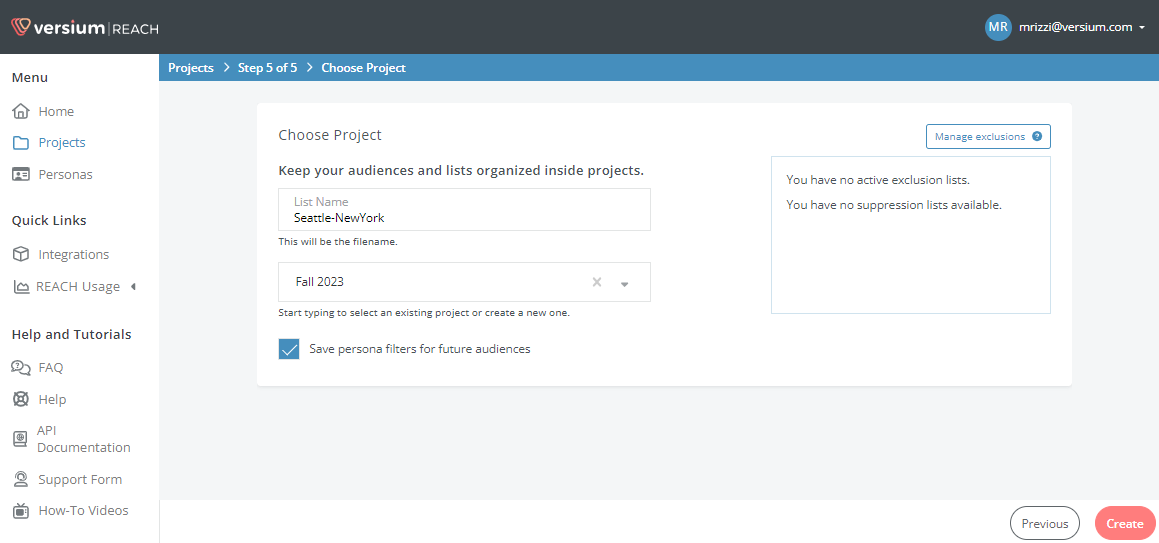
5. Project Assignment
Organize and save your list within a project:
- Name your list and place it in a new or existing project.
- To save these settings for future use, select "Save persona filters for future audiences".
6. Finalize and Create List
Complete the list creation process:
- Click Create List to initiate the creation of your list.
- An estimated time of completion will be shown.
- A notification will be sent to your email upon the list's readiness.